
How to Prepare Artwork for an Exhibition
A practical, checklist-led guide for artists preparing accepted work for an exhibition — covering records, labels, prices, certificates, images, condition notes, packing, delivery and follow-up.
23 min read
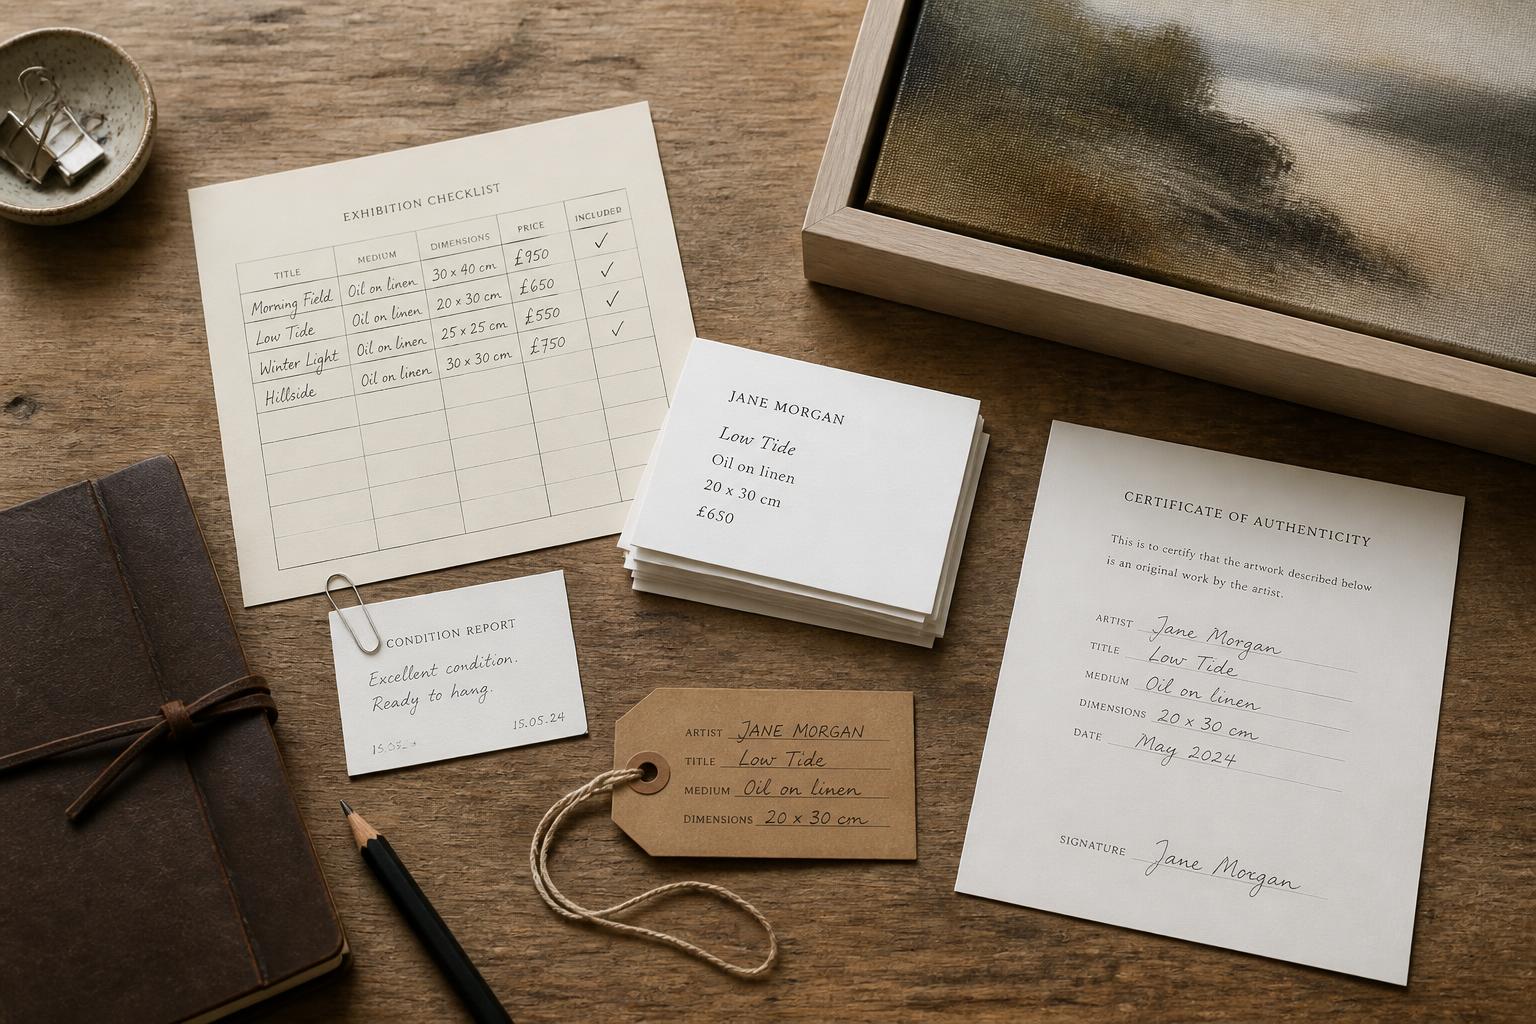
Getting accepted into an exhibition is exciting, but it is only the first step. The work still needs to be prepared so that it arrives in the right condition, with the right paperwork, on the right day, and with every detail the organiser needs to hang it, label it, insure it and sell it.
Exhibition preparation pulls together almost every part of an artist's practice at once: the artwork records, the artwork inventory, the labels, the prices, the certificates of authenticity, the images, the condition notes, the packing, the delivery and the communication with the organiser. When any one of those is missing or inconsistent, the result is usually small but visible — a label with the wrong dimensions, a price that contradicts the website, a sold work that never made it back into the records, a damaged corner that nobody photographed before delivery.
This guide is a practical checklist for artists who have just been accepted into an exhibition and want a clear sequence to work through. It assumes you are a practising visual artist preparing for an open call, a gallery show, an art society exhibition, a group show or a small solo presentation, rather than running the whole exhibition as a curator. If you want a one-page version you can tick off as you go, skip to the art exhibition checklist near the end.
Start with the exhibition requirements
Before you touch a frame or write a label, read the acceptance email and the exhibition pack carefully — twice. Make a single document listing every requirement and every date. At a minimum, capture:
- delivery date and address, with cut-off times
- collection date and address after the show
- private view or opening date and any artist call times
- hanging and framing requirements (D-rings, mirror plates, frame type, glazing rules, maximum weight)
- label requirements — who produces the labels, what information they need, and in what format
- image and publicity requirements, including resolution, file naming and deadlines
- sales commission percentage and how payment is handled
- insurance terms and where responsibility passes from artist to organiser
- whether the organiser needs a price list, artist statement, biography, certificate or signed loan form
- any restrictions on substitutions if a work sells or becomes unavailable before the show
Build this checklist before you do anything else. It is much easier to prepare a clean set of files once than to keep going back to the email to check what was asked for.
If the acceptance came through an open call, re-read the original brief alongside the acceptance to make sure the work you are sending still matches what was selected. The article on Open Calls for Artists covers what to expect at this stage in more detail. If you are showing through a commercial gallery, the conventions in How to Get Your Art Into a Gallery and Gallery Consignment for Artists apply alongside everything below.
Set up the exhibition as a single working list
Once you have the requirements, confirm exactly which works are going. Even a small group show can drift if the artist and the organiser have different lists in their heads. The most reliable way to prevent that drift is to treat the exhibition as one working list — a single place where the accepted works, their details and their status live for the duration of the show.
If you keep your archive in Vault Canvas, this is what an exhibition record is for: you create the exhibition, select the accepted works from your archive, and that selection becomes the working list everything else is produced from — labels, price lists, inventory and publicity all draw on the same set of works. If you work on paper or in spreadsheets, the same principle applies: one master list, dated, that you and the organiser both refer to.
For each accepted work, the list should hold:
- title and year
- medium
- framed dimensions in centimetres and inches, and unframed dimensions where relevant
- weight, if the venue has a weight limit
- price, including framed vs unframed if both are offered
- edition number and edition size where the work is part of a limited edition
- inventory or archive reference number from your artwork record
- current availability and whether substitutions are permitted
Exhibitions often need details that differ slightly from your master records — a shortened title to fit the organiser's label template, an exhibition price that includes framing, or a status such as reserved or not for sale that only applies for the duration of the show. Handle these as exhibition-specific overrides, not edits to the underlying record. In Vault Canvas, title, price and status can be set per exhibition without touching the artwork record itself, which stays the canonical source. However you manage it, the rule is the same: the artwork record keeps the permanent facts, and the exhibition carries the temporary ones.
Then check that the artwork list, the labels, the website records and the price list all match. A common cause of awkward exhibition moments is a small mismatch between a label, a price list and the artist's own website. Fix any inconsistencies now, while the files are still open. You should not be retyping titles, mediums, dimensions and prices from memory or from old emails — the version sent to the organiser should be the same version that already lives in your artwork record.
Prepare the physical artwork
Take each work out somewhere with good light and check it carefully:
- the surface fully dry and stable, with no last-minute varnish, wet paint or new fixings
- the frame, mount and rebate free of dust, fingerprints and old labels
- glass or acrylic glazing cleaned with an appropriate cloth
- painted or finished edges where they will be visible
- hanging hardware — D-rings, cord, mirror plates or whatever the venue requires — fitted securely and to the height the organiser has specified
- a clear label on the reverse carrying your name, the title, the year, the medium, the dimensions and the inventory number
- for prints, the edition number on the work matching the number in your records and on the certificate
If a work is still drying, choose a different piece. A small dent in a frame is repairable; a fingerprint dragged through wet varnish on the way to the courier is not.
How to label artwork for an exhibition
Labels are among the most visible pieces of administration in any exhibition. Visitors read them before they read the room sheet, and collectors use them to decide whether to ask about price. Clear, consistent artwork exhibition labels make the work look considered; messy or inconsistent ones undermine it.
It helps to think of exhibition labelling as a small family of documents, each with a different job:
- Identification labels — fixed to the back of the work itself, so the piece can always be identified if it is moved, stored or separated from its frame. Carry your name, title, year, medium, dimensions and inventory number. Print two copies: one on the work, one kept with the exhibition paperwork. A free Artwork Identification Label Template is available if you do not already have a format of your own.
- Hanging tags — temporary tags that travel with the work through delivery and installation, so handlers and hangers can match each piece to its position without unwrapping it fully or turning it over. Again, two copies are worth printing.
- Minimal wall labels — the standard public label beside the work: artist, title, year, medium, dimensions, price or NFS, and edition details for prints.
- Narrative wall labels — the same information plus a short line or paragraph of context, where the organiser allows it. Useful for work whose meaning is not obvious at first glance.
- Display sheets — a full page per work, with a larger image and more room for description, typically kept in a folder at the desk or handed to serious enquirers rather than fixed to the wall.
- Packaging labels — on the outside of the packing, so the work can be matched to its case during delivery, hanging and return.
A typical artwork exhibition label carries:
- artist name
- artwork title, usually in italics
- year of completion
- medium
- dimensions (height × width, sometimes × depth, in centimetres)
- price, or NFS if the work is not for sale and the organiser allows that wording
- edition number and edition size for prints (for example, 3/25)
- inventory or reference number for the organiser's records
- an optional short line of description, where the organiser allows it
- a QR code linking to the artwork's details page, if appropriate to the venue
Requirements vary. Some exhibitions display prices on the wall; others list them only on a separate price sheet. Some art societies have strict templates; some commercial galleries strip back to title, medium and price only. The point is not to invent your own format — it is to give the organiser the right information, in the format they have asked for, and to keep the same information on the identification label so the work can never be misidentified later. Even when the organiser produces the wall labels themselves, the data they print comes from what you supply, so the accuracy is still your responsibility.
Producing this family of documents by hand for every show is exactly where errors creep in. If your exhibition is set up as a working list in Vault Canvas, the labels, hanging tags and display sheets are generated from the works you selected — every document carries the same titles, dimensions and prices because they all come from the same place, with the exhibition-specific overrides applied. The same selection also produces a QR image for each work, resolving to its permanent artwork-details page, and an exhibition inventory: a single document listing everything in the show with its details and status. The inventory can accompany and support the delivery paperwork, though a signed handover or delivery note may still be required by the venue. All of it can be downloaded together as a complete exhibition materials pack.
A QR code linking to a permanent, well-maintained artwork-details page is one of the easiest ways to turn a curious visitor into a follow-up enquiry, and it lets serious collectors check provenance and edition details without interrupting the show.
Artwork label example
A simple wall label for an original painting might look like this:
Andrew Bowers Standing Ground, 2026 Acrylic and mixed media on panel 60 × 60 cm £850 Inventory no. AB-2026-014
Each line does a specific job. The artist name identifies the work. The title and date locate it in your practice. The medium tells a buyer what they would actually be living with. The dimensions let them imagine it on a wall. The price either invites the conversation or, if absent, signals that prices are listed elsewhere. The inventory number is rarely noticed by visitors, but it is the line that lets the organiser, the courier and you all refer to the same piece without confusion.
If the work is part of an edition, add the edition number and edition size — for example, 3/25 — directly under the medium line. If the work is not for sale, use NFS only if the organiser allows it; some exhibitions prefer "Private collection" or "Collection of the artist" instead. If prices are not displayed on the wall, follow the exhibition's chosen format on the room sheet rather than inventing a new one.
Prepare certificates and artwork records
For original works and limited edition prints, the paperwork is part of what the collector is buying. Where certificates are appropriate, they should be prepared and ready to issue before the show opens.
Certificates sit apart from the exhibition materials described above. Labels, tags, display sheets and the inventory are working documents for the show — they exist to identify, hang and sell the work, and most are discarded or filed when the show ends. A certificate of authenticity is different: it belongs to the work for its whole life, and it is not displayed or handed out during the exhibition. Prepare each certificate in advance and keep it somewhere safe with the exhibition paperwork; the final certificate is normally signed, dated and supplied to the buyer when ownership transfers — at the point of sale, not before.
Before delivery, make sure every accepted work has:
- a certificate of authenticity prepared and ready to issue where appropriate
- a complete entry in your artwork archive, with all metadata up to date
- an agreed price and commission arrangement, recorded in your consignment or exhibition record
- edition details where relevant, including total edition size and numbers remaining
- high-resolution image files, properly named and stored
- condition report notes and photographs taken before packing
- the current exhibition history, so the new show can be added straight after
- any consignment or representation paperwork with galleries who hold related works
The moment a sale is confirmed, you should be able to hand over a complete, professional package without scrambling. The same record then comes back into the archive after the show, with the exhibition added to the work's history. For more detail, see the guides on certificates of authenticity, provenance, artwork archive systems, artwork management and limited edition prints.
Check pricing and sales details
Pricing for an exhibition is rarely just the number on the wall. Before delivery, work through:
- the retail price for each work
- the organiser or gallery commission, and whether it is calculated on the retail price or net of VAT
- VAT, if you are VAT-registered
- who handles payment from the collector, how it reaches you, and when
- a single master price list the organiser can use directly
- which works are NFS, and the wording the organiser uses for them
- consistency between exhibition prices and the prices on your website and at other galleries
- whether framed and unframed prices differ, and how that is signalled
The two pricing mistakes that most damage an artist's reputation are not high prices or low prices — they are inconsistent prices and quiet price changes. A work priced at £850 in the exhibition but £950 on your website tells a serious collector something they should not be told. A separate guide on this sits in How to Price Your Art; related thinking on selling channels and aftercare is in How to Sell Artwork Online, and consignment-specific commission patterns are in Gallery Consignment for Artists.
Prepare images and publicity details
Almost every exhibition needs more material from artists than they initially ask for. Preparing the publicity pack in one sitting, well before the deadline, saves a lot of last-minute scrambling.
A standard publicity pack contains:
- a high-resolution image of each accepted work, square-on, colour-corrected
- a cropped or square version for social media, where requested
- title, medium, dimensions and price in plain text the organiser can copy
- a current artist biography of around 100–150 words
- a current artist statement appropriate to the work in the show
- a recent headshot, if requested
- written permission to use the images and text for publicity, plus a clear image credit and copyright line
- consistent file names (for example,
bowers-standing-ground-2026.jpg) and alt text where images will be published online
Submit everything well before the publicity deadline. Press deadlines are often earlier than artists expect, and a late image is sometimes the difference between being featured in the listing and being left out of it. The guides on Artist CV and Biography, How to Write an Artist Statement and Copyright for Artists are useful refreshers if you have not updated these recently.
Exhibition pages, posters and hero images
If your exhibition has its own page on your website, decide early how visible it should be. In Vault Canvas an exhibition page is either public — listed on your Exhibitions listing and open to search engines — or unlisted, which means precisely two things: the page is omitted from your Exhibitions listing and excluded from search indexing. Anyone you give the direct link can still view it — and they can forward it — so an unlisted page should never carry anything you would not want a stranger to read. Unlisted is a sharing convenience, not privacy.
For genuinely private presentations — a selected group of works intended for one gallery, collector, adviser or client, where you control exactly who sees it — use a different tool entirely. Vault Canvas Viewing Rooms are built for this: each room is shared through an unguessable link, with optional password protection, and access can be revoked at any time. No link alone guarantees confidentiality, so treat the password and revocation as part of the arrangement. A viewing room also never becomes part of a work's exhibition history — and that matters, because a private presentation is not an exhibition, and your records should not pretend otherwise.
Two kinds of image are worth gathering at this stage:
- The organiser's exhibition poster, where one exists. Posters are usually portrait and carry important text — dates, venue, sponsors — so they should always be shown whole and uncropped. Uploading one to your exhibition page in Vault Canvas displays it complete in its original proportions within the page content, never cropped into a header. Because the poster's text matters, it needs a written description (alt text) for visitors who cannot see it.
- An optional landscape hero image for the top of the exhibition page and for social previews. This should be a wide, mainly visual image — a strong artwork detail or installation view — not the poster. Text-heavy images crop badly in a wide header and make poor link previews, so if the only image you have is the poster, leave the header text-only and keep the poster in the page body.
Condition notes and insurance
Before any work leaves the studio, photograph it. It is one of the most useful insurance steps you can take, and it costs nothing.
For each work, photograph the front square-on in even light, the back including any identification label, the frame and mount (especially corners and edges), and any existing marks or characteristics of the materials so they cannot later be confused with new damage. Save the images against the artwork record, dated.
Then confirm the insurance position in writing. Some venues hold full nail-to-nail cover from collection to return; some only insure while the work is hung; some expect the artist to arrange their own cover. Confirm who carries the risk during transit, install, the exhibition itself and return, and keep delivery and collection receipts together with the condition photographs.
When the work comes back, inspect it before signing anything — ideally in good light, with the photographs to hand. If you find damage, report it immediately while the courier or organiser is still there, and update the artwork record. The guide on Artwork Valuation and Insurance covers the underlying valuation and cover questions in more depth.
Delivery, packing and handover
Packing should match the value and fragility of the work and the way it is being moved. For most original paintings and framed prints that means corner protectors and a sheet of glassine or acid-free tissue against the surface, bubble wrap or foam padding around the frame, and a rigid outer — a fitted cardboard sleeve for short journeys, or a flight case or crate for couriered or long journeys.
Label the outside of the packaging clearly with your name and contact details, the artwork title, the inventory number, the exhibition title and the delivery address. Inside, include a delivery note listing the contents of the case and any hanging instructions — the exhibition inventory, if you have produced one, works well alongside it. Pack enough material to repack the work safely for the return journey.
Decide in advance whether you are hand-delivering or using a courier. Hand delivery gives you more control and lets you inspect the hanging space, but it also costs your own day. A specialist fine art courier is worth the extra cost for fragile, large or high-value work. Whichever route you choose, keep evidence of handover — a signed delivery note, a photograph of the work in the venue, or a short email confirming receipt — and check whether the venue can store the packaging during the show.
Exhibition opening and sales follow-up
The opening night and the days immediately after are when prepared artists pull ahead. Bring business cards or a small QR code card that points to your permanent artwork-details pages, and have your portfolio ready to share quickly if a collector asks. Be ready to take enquiries calmly, with a follow-up plan rather than a closing pitch.
Record any sale promptly with the date, price, commission and buyer details. Update sold or available status across the exhibition price list, your website and any other channels within 24 hours. Send a short, personal follow-up to anyone who showed real interest, regardless of whether they bought on the night.
After the show: records, history and CV
The show coming down is not the end of the work — it is the moment the records are made permanent, and the artists who do it promptly are the ones whose archives stay trustworthy.
Work through each exhibited piece while the details are still fresh:
- Availability and sales status. Mark each work sold, reserved, returned or still available. Where exhibition-specific titles, prices or statuses documented what was actually shown, keep them as the record of the show; then reconcile the final outcome with the canonical artwork record and the sales record, so current availability is unambiguous everywhere.
- Exhibition history. Add the exhibition — title, venue, location and dates — to every work that was shown. Exhibition history contributes to the work's provenance evidence, and gaps here are hard to reconstruct years later. Note that only real exhibitions belong here; private presentations such as Viewing Rooms are deliberately excluded.
- Provenance and sales records. For each sale, record the buyer details you are permitted to keep, the price and commission, the date, and the date the certificate of authenticity was handed over. For anything damaged, keep the condition photographs and the outcome of the claim with the work's records.
- Your artist CV. Add the exhibition to your artist CV and biography with the same title, venue and dates you recorded against the works, so the two never disagree.
- The exhibition file. Keep the organiser correspondence, delivery and collection receipts, final price list, inventory and insurance confirmation together in your exhibition file, so next year's application or insurance question has a complete record to draw on.
Selling at the exhibition itself is only one part of the return. Many of the most useful collector relationships start as quiet conversations at an opening and convert months later, often through your website or a follow-up email. The guide on How to Sell Artwork Online covers the channels and conventions for that longer follow-up.
Art exhibition checklist
Print this, or copy it into your own notes, and tick each item off as you work through it.
Requirements and records
- accepted artwork list confirmed in writing with the organiser
- organiser requirements reviewed and saved as a single document
- single working list created for the exhibition — an exhibition record, a spreadsheet or a dated master document
- title, medium, dimensions and price checked for every accepted work
- exhibition-specific titles, prices and statuses set as overrides, with artwork records left canonical
- artwork records complete, with inventory numbers and current availability
- certificates of authenticity prepared where appropriate, ready to issue at sale
- prices, commission and VAT position confirmed and reconciled with website
- condition photographs taken of front, back, frame and any existing marks
- insurance responsibility confirmed in writing for each leg of the journey
Materials and publicity
- identification labels and hanging tags prepared, two copies of each
- wall label information supplied in the organiser's required format, minimal or narrative as agreed
- display sheets prepared for the desk, where the venue wants them
- QR images generated for works where the venue allows them
- exhibition inventory produced, to accompany the delivery paperwork
- complete exhibition materials pack downloaded or printed for the show file
- high-resolution images and social crops supplied, correctly named
- artist biography and statement supplied at the correct word count
- organiser's exhibition poster saved whole and uncropped, with a written description
- optional landscape hero image chosen for the exhibition page and social previews
- exhibition page visibility set deliberately — public, or unlisted for direct-link sharing
- any genuinely private presentation moved to a viewing room, outside exhibition history
Delivery and display
- packing prepared, with corner protection, padding and a rigid outer
- delivery date and address confirmed, with a delivery note inside the packaging
- handover receipt or signed delivery note kept
- website and availability status updated when the show opens
- sale status tracked during and after the exhibition
After the show
- final outcome for every work reconciled with the canonical artwork record and sales record
- exhibition added to each work's exhibition history, contributing to its provenance evidence
- exhibition added to your artist CV, with matching title, venue and dates
- organiser correspondence, receipts and insurance confirmation kept together in the exhibition file
If you are running the same routine repeatedly, the underlying exhibition checklist becomes part of your studio practice rather than something invented every time. That is where the real time saving lives.